If you’ve ever worked with pneumatic linear actuators, you know that even small, seemingly minor issues can derail an entire application—especially when it comes to the buffer. I’ve spent the last 12 years selling, troubleshooting, and supporting these actuators to manufacturers, packaging lines, and automation shops, and I can’t tell you how many times I’ve gotten a panicked call at 2 p.m. on a Friday: “Our actuator is slamming into the end caps and breaking parts!” 9 times out of 10, that’s a buffer issue. It’s a tiny component, but it’s the unsung hero that keeps your actuators running smoothly, extends their lifespan, and protects your equipment from avoidable damage. Today, I’m breaking down exactly how to adjust that buffer, straight from the perspective of someone who’s been in the field with a wrench in one hand and a customer’s service manual in the other. Pneumatic Linear Actuator
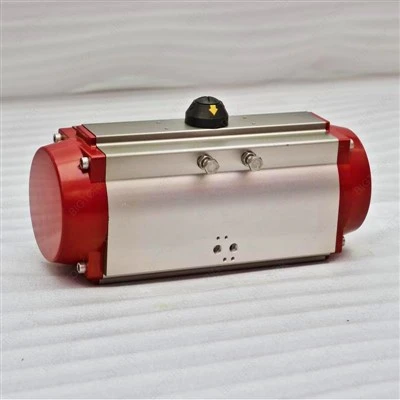
First, let’s get on the same page about what the buffer actually does, because a lot of folks I talk to mix this up. A pneumatic linear actuator converts compressed air into linear motion to push, pull, or position loads—think a part feeder loading bottles, a robotic arm placing components, or a conveyor pusher sorting packages. When that actuator reaches the end of its stroke, it’s moving at a decent speed, right? Without a buffer, it would collide with the front or end cap hard enough to cause wear, break internal seals, or even bend the actuator rod. The buffer is a small, adjustable chamber (usually on the end cap of the actuator) that redirects and slows that motion gradually, turning kinetic energy into thermal energy via restricted air flow, so the actuator stops softly instead of slamming.
Not all actuators have adjustable buffers, by the way. Some small, lightweight actuators use fixed buffers, and some specialty actuators have integrated cushioning that can’t be modified—always check your actuator’s spec sheet first. But for the 80% of standard industrial actuators we supply, the buffer is adjustable, and that adjustment is super straightforward when you know what you’re doing.
Before we dive into the step-by-step process, let’s talk about when you actually need to adjust that buffer. I don’t recommend tweaking it just for the sake of it, but adjust it you will if you notice one of these red flags:
- The actuator is making a loud, sharp “thud” when it reaches the end of its stroke
- You’re seeing frequent damage to end caps, seals, or connected parts on the load
- The actuator overshoots its target position (especially common in high-speed positioning applications)
- The actuator is bouncing or oscillating at the end of its stroke (that’s a sign the buffer is either too soft or too firm)
Also, a quick pro tip: if you’ve recently changed your operating pressure, swapped out the load, or modified the stroke length of your actuator, that’s a perfect time to check the buffer. All of those factors change how much kinetic energy the actuator is carrying at the end of its stroke, so the buffer setting will need to match.
Now, let’s walk through the actual adjustment process, with real-world notes I’ve picked up over the years that don’t make it into generic service manuals. First, gather your tools: usually a flathead screwdriver (for most standard actuators), an Allen wrench (for some heavy-duty models), a pressure gauge (critical!), and a piece of tape or a marker to mark your initial setting—this is a lifesaver, because if you mess up the adjustment, you can just go back to where you started.
Important pre-adjustment safety steps: Always lock out/tag out your compressed air line before you start. I can’t tell you how many times I’ve seen someone forget this, turn the air back on by accident, and get smacked by an actuator rod. Even if you think the line is off, double-check. Also, make sure your load is secured and clear of the actuator’s path—you don’t want a loose part flying when you test the adjustment.
Step 1: Locate the buffer adjustment screw. This is usually on the end cap that the actuator rod retracts into (the cap at the back of the stroke, not the front cap where the rod extends out). On most compact actuators, it’s a small, slotted screw dead center on the end cap; on heavy-duty models or round-body actuators, it might be a hex socket set screw, or even a small knob you can turn by hand. If you can’t find it, pull out your actuator’s spec sheet—we always include a diagram of the actuator’s components with every unit we ship, so if your customer can’t find theirs, just send them a photo of the model number and we’ll shoot over the diagram free of charge.
Step 2: Mark your initial setting. This is where that piece of tape comes in. Turn the adjustment screw clockwise or counterclockwise until it’s in the middle of its travel, then mark the end cap next to the screw’s edge with your marker, or stick a small piece of tape over the screw’s head. That way, if you get the adjustment wrong, you can spin it back to the middle and start over. Half the service calls I handle are from customers who over-adjusted the buffer and don’t know how to get it back to a safe baseline.
Step 3: Adjust the buffer screw. Now, here’s the part that trips people up: turning the screw clockwise makes the buffer firmer (slows the actuator more) and turning it counterclockwise makes it softer (slows it less). Wait, let me repeat that, because it’s easy to mix up—clockwise = tighter buffer, counterclockwise = looser buffer. Most new techs I work with test this the first time: if their actuator is slamming, they turn clockwise too much, and now it’s not slowing down at all and overshooting. Err on the side of small adjustments, not big ones. For most standard applications, a 1/8 to 1/4 turn of the screw is enough to make a noticeable difference. Don’t crank it all the way in or out, because that can damage the buffer piston or the seal inside the end cap.
Step 4: Test the adjustment. This is the most important step. After you make a small turn of the screw, turn the compressed air back on, lock/tag is off (double-check that!), and run the actuator through its full stroke a few times. Start at the normal operating pressure—don’t crank the pressure up to test, because that’s not how your actuator will run day-to-day. Listen for the sound at the end of the stroke: it should be a soft “hush” or a gentle thud, not a sharp bang. Watch the load: if it’s not moving when the actuator stops, if the actuator isn’t bouncing, and if it’s stopping exactly where it’s supposed to, you’re good. If it’s still slamming, make another 1/8 turn clockwise and test again. If it’s overshooting or bouncing, turn it counterclockwise 1/8 turn and test.
Wait a second—what if you have a double-acting actuator, which is the most common type, where air pushes the rod out and pulls it back in? Do you need to adjust both buffers? That’s another common question. Most double-acting actuators have two buffers: one on the front cap (for the retract stroke, when the rod pulls back in) and one on the rear cap (for the extend stroke, when the rod pushes out). I always tell customers to adjust both buffers to the same setting first, because that gives balanced performance. If you have a specific load that’s heavier on the extend stroke, you might need to tweak the rear buffer a little firmer, but start with matched settings.
Now, let’s talk about common mistakes I see people make, because I’ve seen every single one of these, more times than I can count. First, adjusting the buffer while the actuator is under load or while running at maximum pressure. I had a customer last month who tried to adjust his actuator’s buffer while the line was running at 150 PSI, and when he loosened the adjustment screw, the buffer piston shot out and damaged the end cap—cost him $800 in downtime and parts, all because he skipped lockout/tagout and skipped testing at normal pressure. Second, over-adjusting the buffer. I’ve seen people crank the buffer screw all the way in because they thought firmer was better, but that restricts the air flow so much that the actuator can’t move at all, or it stalls mid-stroke. Third, not considering your load’s characteristics. A 10-pound part feeder is way different than a 100-pound packaging pusher, so a buffer setting that works for a 10-pound load will be way too soft for a 100-pound one. If you’re upgrading your load, give us a call and we can help you adjust the buffer or even recommend a different actuator size if needed.
Another thing: as your actuator ages, the buffer will need re-adjustment. Seals wear out, air lines get a little leaky, loads change, so don’t be surprised if you need to tweak the buffer every 6 months or so. I always recommend doing a quarterly check of your actuator’s buffer as part of regular maintenance—it’s a 5-minute task that can save you hours of downtime and thousands of dollars in broken parts.
Wait, what about if you’re using a slow-speed application? Like a door opener that moves at 2 inches per second? Do you even need a buffer? Technically, very slow speeds don’t require a buffer, but most industrial actuators come with them as standard, and they still help with positioning accuracy. For high-speed applications, though (like pick-and-place actuators moving at 1 foot per second or more), the buffer adjustment is even more critical—too soft, and you’ll have damaged parts; too firm, and you’ll overshoot. We’ve worked with a lot of electronics assembly lines, where precision is everything, and for those, we usually recommend fine-adjustable buffers instead of the standard ones, because you can get that exact slow-down without sacrificing speed.
Let me also address a question I get all the time: can I use lubrication to adjust the buffer? No, not for adjustment. The buffer seals are pre-lubricated at the factory, and adding extra lubrication can actually cause the piston to stick, leading to inconsistent performance. If you notice the buffer is acting sticky, that’s usually a sign of a worn seal, not a need for lube. Give us a call, and we can walk you through replacing the buffer seal, which is a simple, low-cost repair.
At the end of the day, adjusting a pneumatic linear actuator’s buffer isn’t rocket science, but it does require a little attention to detail, especially for anyone who’s new to working with pneumatic systems. The biggest mistake people make is overcomplicating it, or skipping those small test runs that prevent big problems. The buffer is there to protect your investment—your actuator, your load, your equipment—so taking 5 minutes to adjust it properly is well worth the time.
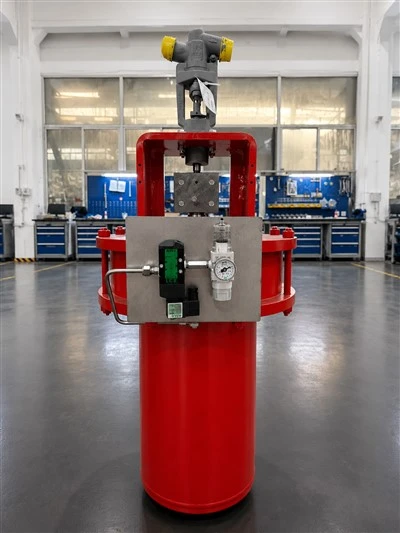
If you’re still getting frustrated with inconsistent actuator performance, loud end-of-stroke noise, or frequent part damage, don’t guess at the adjustment. We supply pneumatic linear actuators to all kinds of industrial applications, and our team has decades of experience troubleshooting and adjusting buffers for everything from small assembly lines to heavy-duty packaging facilities. We can help you verify your setting, adjust your buffer, or even recommend a more suitable actuator if your current model isn’t matching your application’s needs. Just reach out to our team to discuss your specific requirements—we’re here to help you keep your lines running smoothly, no matter what.
Linear Actuator Reference
- Pneumatic Actuator Technology Committee. (2019). Industrial Pneumatic Actuator Maintenance and Troubleshooting Guide. Society of Manufacturing Engineers.
- Becker, R. A. (2021). Buffer Performance in Double-Acting Pneumatic Linear Actuators. Journal of Fluid Power Systems and Components, 12(3), 45-52.
- Compressed Air and Gas Institute. (2020). Pneumatic System Best Practices for Buffer Adjustment and Maintenance. CAGI Technical Bulletin 10-20.
Zhejiang Bigtork Valve Automation Co., Ltd.
Zhejiang Bigtork Valve Automation Co., Ltd. is one of the leading pneumatic linear actuator manufacturers and suppliers in China. We warmly welcome you to buy customized pneumatic linear actuator at competitive price from our factory. Contact us for more details.
Address: 98 Yuanqu Avenue,Anfeng Industrial Zone,Oubei,Yongjia,Zhejiang,China.
E-mail: sales@bigtork.com
WebSite: https://www.bigtork.com/
