If you’re in the metalworking space, you know induction annealing machines are total workhorses—they heat metal parts super fast, no flame, precise, which is why so many fab shops, automotive parts makers, and even custom tool builders swear by ’em. But let’s be real: those induction coils, the little looped bits that do the actual heating? They take a beating. Burn marks, kinks from shifting parts, corrosion from metal dust or coolant seepage, even tiny cracks that sneak up and kill your annealing cycle. As an induction annealing machine supplier who’s been on the floor fixing these things for customers for 8 years, I’ve fixed hundreds of wonky coils, and I’m here to walk you through exactly how to repair ’em without wasting money on a brand new one. No fancy jargon, just real, doable steps. Induction Annealing Machine
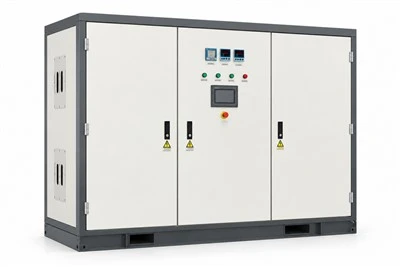
First off, let’s get one thing straight: not every coil is worth fixing. I’ve seen folks waste 3 hours patching a coil that’s been fried by a power surge—way cheaper to swap it out. So your first move is a quick diagnostic check. Grab a multimeter (not the cheap $10 one from the hardware store, get a $40 digital one that can do ohms and continuity) and a flashlight. Unplug your machine first—safety non-negotiable, I don’t care if you’re in a rush. You don’t want a zappy surprise from 480V induction power.
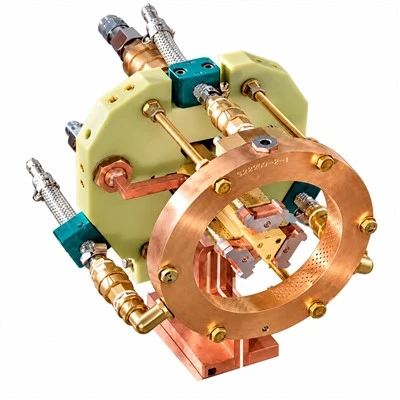
Now, what are the most common coil issues? Let’s list ’em quick: 1) Surface burn spots (dark, pitted areas where heat or corrosion ate at the copper), 2) Tiny cracks (often at the bends where the coil loops, super hard to see), 3) Loose connections (the bolts holding the coil to the machine’s power terminals, they rattle loose from vibration), 4) Coolant leaks (induction coils are water-cooled, so if coolant is dripping out, that’s a bad one). If your coil has a big crack longer than ¼ inch, or burn spots that eat through more than 10% of the coil’s cross-sectional area, save your time—order a new one. But if it’s a small crack or loose connection, keep reading.
Let’s start with the easiest fix first: loose connections. This happens more than you think. Every time a part clamps down, or the machine vibrates during a shift, the bolts that clamp the coil to the terminal blocks work their way loose. How to spot it? Your annealing parts are only getting half as hot as they should, or the machine throws a “low power” error. Grab a wrench matching the bolt size (most coils use ¼ or 5/16 inch, but check your machine’s manual), tighten ’em down to the torque spec—usually 15-20 ft-lbs, don’t crank it too hard or you’ll strip the threads. After tightening, use that multimeter to check continuity between the two coil terminals. If it’s a solid low reading (way less than 1 ohm, most good coils read 0.2-0.5 ohms), you’re good. If not, move to the next step.
Next up: small coolant leaks. These usually come from micro-cracks at the coil’s bend points, where the copper tubing was formed into loops. Coolant seeps out, which is bad because it can short out the machine’s electronics. First, drain the coolant line connected to the coil—put a bucket under the connection, loosen the hose clamp, and pull the hose off. For small cracks (less than 1/8 inch), my go-to fix is epoxy designed for metal, specifically copper, that’s heat-resistant up to 500°F. Wait, not regular epoxy—get the kind marketed for automotive or HVAC, it sticks to copper and won’t crack when the coil heats up. Clean the area around the crack first with rubbing alcohol and a rag, so there’s no oil or grime. Let it dry, mix the epoxy, apply a thin layer over the crack and a little around it, let it cure for 2 hours minimum (check the package, don’t rush this). Once cured, test the leak by blowing compressed air through the coolant line (set it to low, 10-15 PSI) and submerging the end of the coil in a bucket of water. If no bubbles come up, you fixed it. If bubbles do, the crack is bigger, so you’ll need to solder it.
Soldering a copper coil is a little trickier than soldering a wire, but manageable with the right tools. You’ll need a propane torch (small, not a blowtorch that’ll melt the coil), lead-free silver solder (regular solder melts too low, will pop off when the coil heats up), flux (super important—copper oxidizes fast, flux keeps it clean), and a pair of heat-resistant gloves. First, make sure the area around the crack is clean—no epoxy, no grime. Heat the copper gently with the torch, hold it an inch or so away, move it back and forth so you don’t overheat one spot. Once the copper is hot enough that a drop of water sizzles on it, apply flux to the crack. Then touch the solder to the crack—if it melts and flows evenly into the crack, you’re golden. If it beads up, the copper isn’t hot enough, keep heating a little more. Let it cool for 5 minutes, don’t touch it. Test for leaks again with compressed air and water. If it still leaks, you might need to braze it instead—brazing uses a higher temp filler, but that’s a step for when soldering doesn’t work.
Now, what about surface burn spots? Those are the dark, pitted areas that don’t leak, but can make your heat uneven. If the burn spot is small (less than ¼ inch across), you can smooth it out with a fine-grit sandpaper (320 grit, super smooth) or a rotary tool with a sanding attachment. Don’t sand too hard—you don’t want to thin the copper tubing, that’ll make it more prone to cracking later. Once smooth, wipe it down with alcohol, and if you’re worried about corrosion later, you can spray a thin coat of copper anti-oxidant on the area (it’s a clear spray, won’t mess with the induction field). If the burn spot is bigger than that, or the copper is more pitted, it’s probably time to replace that section of the coil, not just sand it. Most coils are made of ¼ inch or 5/16 inch copper tubing, so you can cut out the bad section, splice in a new piece with a compression fitting or soldered joint. Just make sure the new piece is the same diameter as the old one, and when you bend it back into shape, match the original coil’s radius—too tight a bend will restrict coolant flow, too loose will mess up the induction field.
Wait, there’s a big mistake I see people make all the time: fixing a coil and not checking the induction field after. That’s the part that makes the heat happen—if the coil isn’t shaped right, even a perfect repair won’t work. Once you’re done repairing the coil, clamp it back into the machine, refill the coolant, and run a test with a small metal part. If the part anneals evenly (no hard spots, no soft spots), you’re good. If it’s wonky, double-check the coil shape, and make sure the connections are tight.
Now, when should you just call it quits and buy a new coil? Let’s be honest, sometimes it’s cheaper. If your coil has a crack longer than ½ inch, or burn spots that eat through 10%+ of the cross-sectional area, or if you had a power surge that fried the copper winding (you’ll see black, charred spots all over), skip the repair. Also, if your coil is older than 5 years, copper gets brittle with repeated heating and cooling, so even a repair might only last a few months, whereas a new coil will hold up way better.
As an induction annealing machine supplier, I can’t stress this enough: regular maintenance is the best way to avoid repairing coils in the first place. Every 3 months, drain and flush the coolant system (use distilled water, not tap water—tap has minerals that cause corrosion), check all the connections for tightness, and inspect the coil for tiny cracks at the bends. A 10 minute checkup every quarter saves you 2 hours of repair work, easy.
Now, if you tried all these steps and it still isn’t working, or you don’t feel comfortable messing with soldering or multimeter checks, don’t force it. Bad repairs can damage your whole machine, which costs way more than a pro fix. We work with fab shops big and small, so if you need a hand troubleshooting, a repair service, or even a replacement coil, reach out to our team. We can help you figure out if repair is worth it, or get you set up with a coil that fits your exact machine and annealing needs. No pushy sales stuff, just real advice for folks who rely on their machines to get the job done.
Wait, let’s wrap this up real quick to make sure I covered all bases. I’ve seen customers fix a coil that looked totally broken, just by tightening a bolt, and others who tried to solder a huge crack and ended up ruining the whole coil. The key is: safety first, diagnose correctly, don’t overrepair, and know when to ask for help. And if you’re looking to upgrade or replace your coil, our team can walk you through options that fit your budget and machine specs—no guesswork, no hidden fees. Reach out to us anytime, we’re here to keep your induction annealing machine running smooth.
Fin Tube Auxiliary Equipment References
- Induction Heating Association. (2022). Maintenance Guidelines for Induction Coils and Equipment.
- Copper Development Association. (2021). Repair and Joining Techniques for Copper Tubing in Induction Applications.
- Metal Forming Magazine. (2023). Common Failures in Induction Annealing Coils and Root Cause Analysis.
Baoding Sitai Induction Heating Equipment Manufacturing Co., Ltd.
Baoding Sitai Induction Heating Equipment Manufacturing Co., Ltd. is one of the most reliable manufacturers and suppliers of induction annealing machine in China, also supports customized service. We warmly welcome you to buy advanced induction annealing machine at competitive price from our factory. If you have any enquiry about quotation, please feel free to email us.
Address: Xinjingji Industrial Park, No.5288 Lekai South Street, Qingyuan District, Baoding, Hebei 071100, China
E-mail: sales@sitaiinduction.com
WebSite: https://www.sitaiinduction.com/
